Route products to prep stations
Create prep stations such as Kitchen and Bar, decide whether orders go to a screen, a printer or both, and send each product to the right station.
On this page
A prep station is a place where orders are made: the kitchen, the bar, the dessert counter. When staff send an order, each item goes to its product's station, on a prep station screen, on paper, or both. Getting this right is what makes a sent order appear in the right place.
Before you start
- You need the Manage prep stations permission to create and change stations, and Manage menu to assign products.
- Prep station screens need Preparation station screens turned on for the location under Settings › Features. Starter allows one prep station screen per location; Pro and Business have no limit.
- Without prep station screens, every station prints its tickets. You then need a station printer (see Set up a printer).
Create a station
- In the back office, go to Settings › Prep stations and select Add station.
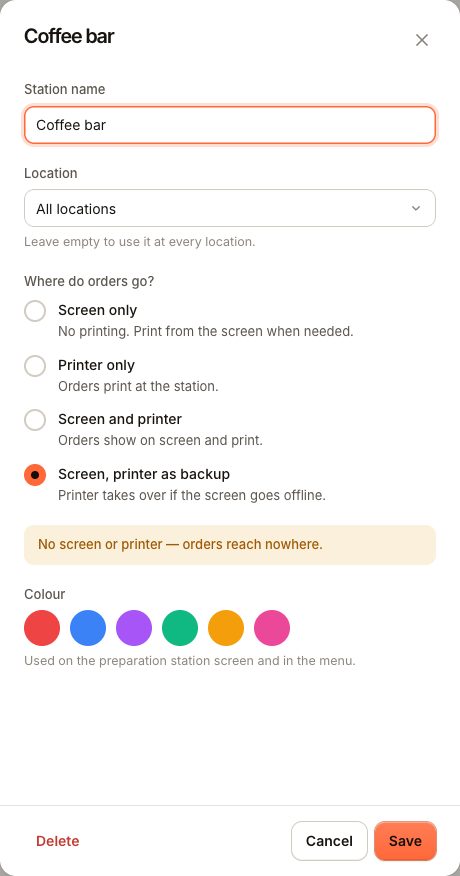
- Enter the Station name, for example "Kitchen" or "Bar".
- Choose a Location, or leave it on All locations to use the station everywhere.
- Under Where do orders go?, choose how the station receives orders. The default is Screen, printer as backup. See Screen, printer or both for what each choice does.
- Pick a Colour. It is used on the prep station screen and in the menu.
- Save.
Send products to a station
Routing is set per product, not per category.
- Go to Menu and open the product.
- Under Availability, choose its Prep station. You can also create a new station from this drop-down.
- Select Save.
Two products in the same category can go to different stations, for example burgers to the kitchen and milkshakes to the bar. An order with items for several stations is split: each station only gets its own items.
A product with None as its station never appears on a prep station screen. It can only print, on a station printer that is not linked to any station.
Connect screens and printers
- Prep station screen: pair a tablet as a prep station screen under Devices (see Pair a device) and choose its Prep station. The screen shows only that station's items. If you leave the station empty in the back office, staff choose it on the screen under Settings › Station.
- Station printer: add the printer from the prep station screen or the till, and link it to the station. If a station has no printer of its own, a station printer that is not linked to any station takes over. See Set up a printer.
Check your set-up
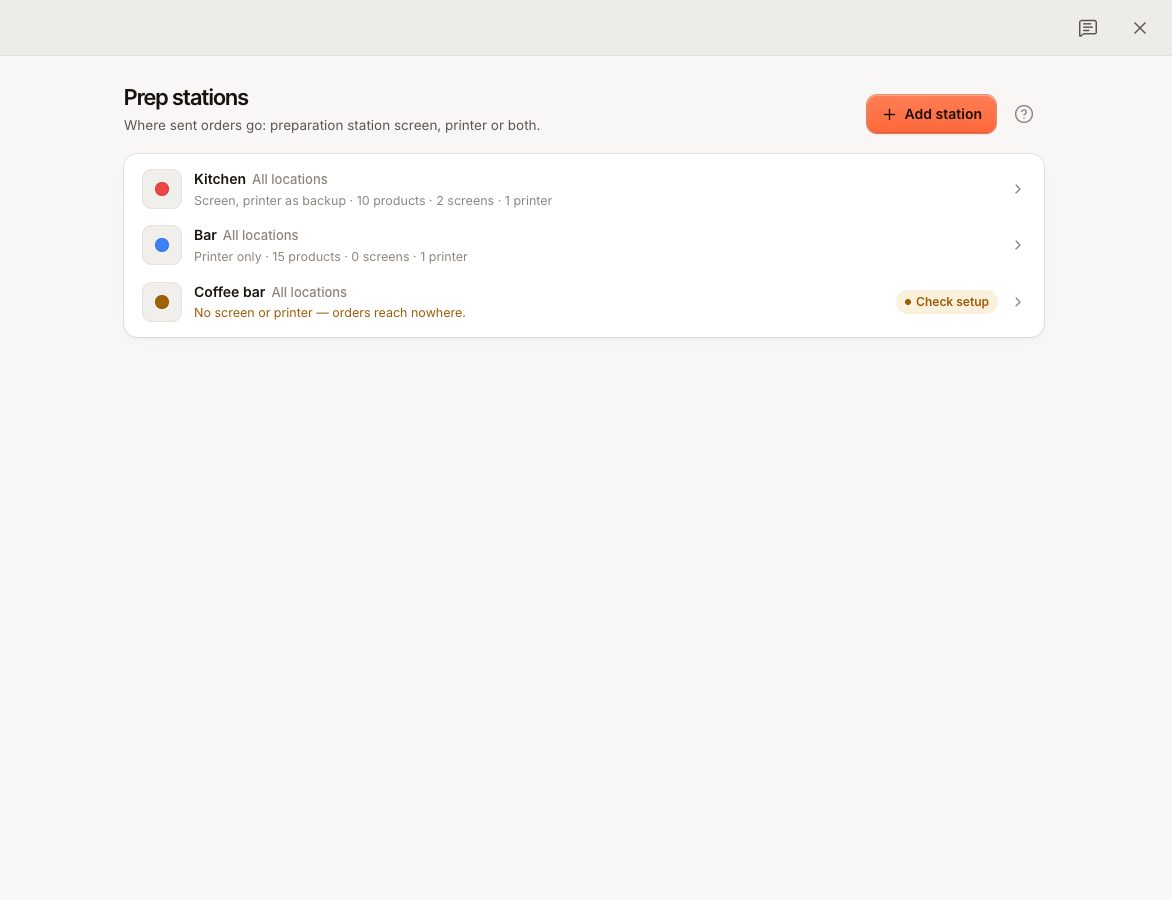
The Prep stations list shows for each station: where orders go, how many products, screens and printers it has. A Check setup badge means orders may reach nowhere:
| Warning | What it means | Fix |
|---|---|---|
| No preparation station screen linked — orders reach nowhere. | Screen only and no screen is linked. | Link a screen, or choose a mode with a printer. |
| Paper expected, but this station has no printer. | Printer only or Screen and printer, without a printer. | Add a printer for the station. |
| No screen or printer — orders reach nowhere. | Screen, printer as backup with neither. | Link a screen or a printer. |
Test it: send an order with an item for each station and check that each one arrives. When an order reaches neither a screen nor a printer, the POS warns "{station} did not receive the order — no screen and no printer."
Delete a station
Move its products to another station first. Then open the station, select Delete and confirm. If products still use it, the delete is refused.
Common questions
Can a product go to two stations?
No. A product has one station. If a dish needs work in two places, split it into two products.
Can I change the station of an item on the screen?
No. Fix the product's station in Menu; new items follow.
Do QR and online orders use the same stations?
Yes. Guest orders follow the same routing once they are confirmed or accepted.
If something goes wrong
- An order did not show up: see An order did not reach the kitchen.
- Nothing prints: see The printer does not print.
- You can't add another screen: your plan's screen limit is reached. See Your plan.